Friday, April 14, 2017

Musings on Space and Time

The topic was organization; specifically, how do you keep track of your sewing stuff (assuming you do) and how do you maximize your sewing time and output?  A lively discussion ensued among the group about sewing space and time.

Most of us have sewing rooms that were carved from an extra bedroom or basement room in our homes, so our spaces were not designed to be sewing studios.  As a result we've had to make-do with imperfect lighting or less-than-ideal configurations.  Many of us have hit upon similar solutions to the problem of storing supplies and organizing projects.

Variety of clear storage boxes and drawers
Two favorite things cropped up in our talk:  clear plastic, whether as bins, bags or envelopes; and office supplies repurposed for sewing use.  Peggy uses a desk carousel for a sewing tool caddy.  Maura likes the Really Useful Boxes brand storage containers that come in various sizes from tiny to large to organize drawer contents and shelves.  Quite a few of us use the rolling carts with clear drawers to give us extra storage near our sewing area - they are a good size to hold sewing and ironing supplies and often fit under a table.  Clear storage bins were popular for storing fabric (because then you can see what's in them) and clear plastic sheet protectors (sleeves) for patterns.  Clear plastic bags are great for packaging all the elements of a project:  pattern, cut-out pieces of fabric, and notions. 

Beyond these items, Mary Ann uses a flannel back tablecloth for a quilt design board.  It can be hung on the wall or laid flat on a bed or table.  She lays out her design on the flannel side.  If she needs to move it before it's done, she just rolls it up and the plastic side protects the whole thing.  She also finds that a pegboard on the wall is a great way to keep a lot of sewing tools handy. 
Labelled fabric swatches

Judy deals with the seasonal aspect of sewing garments by sorting her fabrics according to season, so spring and summer fabrics are stored separately from fall and winter fabric.  Then she can rotate them in and out of her sewing room as needed.  She also keeps binders of swatches labelled with fabric content and yardage to stay aware of her stash.

Kathia found that having a sunny room was important - dark rooms require extra lighting which can heat up a room uncomfortably and take up valuable space.  And natural light is important for quilters to be able to see the true colors of fabric.

Another part of the discussion was about making time to sew.  Some of us have scheduled times (often early morning) to sew; others fit it in whenever they have a few moments.  Some set goals, which can be as varied as sewing an item a week to sewing one seam before dinner.  Some of us make lists of projects we want to make;  these might be prioritized by season or need.

At the end of the meeting we had discovered that although we all have adapted similar ideas to aid our sewing, there were enough differences to give us all some new ideas about maximizing our sewing time and space.

There were a few Show-and-Tell items.  Next month Peggy will be presenting a program on making Dorset buttons.


Peggy's fabric box, opened flat

The fabric box assembled 

Maura's Map quilt


Thursday, March 9, 2017

Brown Bags and Old Projects

Our March meeting kicked off our Brown Bag challenge, as each member brought along a half-yard of fabric to swap.  Then we have until September to be creative with it and use most of it to make something with whatever additions we choose.  This ought to be interesting!

We continued with planning our calendar, discussing various topics and ideas.   One change is that we decided to meet in August and skip December. since the holiday time always seems to be too busy.
Here's a rough schedule, subject to change, as always. 

April:  Organization tips from your sewing room - bring photos or descriptions of whatever you do to make sewing easier for you.  Let's share ideas and help each other to make more or store more or find stuff more easily.

May:  Peggy will lead us through the process to make Dorset buttons.

June: possibly a sewing room tour or guest speaker

July:  service sewing - perhaps preemie clothing

August:  upcycling - idea still to be developed

September:  Brown Bag challenge results

October:  prepare for Make a Difference Day project

November:  cork fabric investigation

December: no meeting

Two other topics for back-up are stuffed animals / soft toys and cathedral window quilting.

We had some Show-and-Tell including some OLD items, some unfinished.  Perhaps now that we've dug those UFO's out, we'll be inspired to complete them!

Peggy's silk jumpsuit from 1994, and it still fits!
Ribbon sweater knit by Peggy's mom

Judy's 70's era shift that she still wears!


Doll skirt made by Judy as a girl


Maura's dollhouse people, made in the 90's
Evening gown for Judy's doll


Peggy's knit top


Shirt-jacket for her husband that Judy still needs to complete


Judy's skirt from many years ago

Judy's tailored jacket - waiting for the style to come back "in"


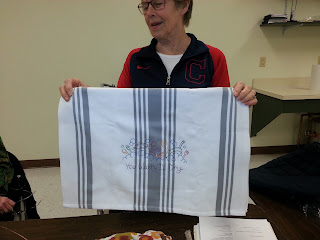
Judy's new project - embroidered dishcloth

Maura's knit shirt


Thursday, February 9, 2017

I Give It Two-Thumbs Up!

The Sewphisticuts became movie reviewers the other night!  Based on an idea from Peggy, members of the group explored the videos and webinars available on the ASG site.  At our February meeting we each "reviewed" our chosen video(s) and summarized the contents. 

Ronnie could not attend but sent in her "homework" by email.  She watched a video about Bindings, and thought it explained everything well, from various ways to make it to the best applications for each type.  But she also thought it was a bit long and boring, and the lack of a close-captioning option to help the hearing-impaired was a negative for her.

Pat also watched a video on binding; specifically, how to bind a hexagon.  She found its slow pace useful as she is a visual learner.  She worked on a sample as she followed the video and found it helped her greatly as binding was something she did not know how to do.  The only drawback was that it didn't cover how to finish off the binding process.

Connie chose a video about machine embroidery, which she found to be a very good introduction.  It covered types of thread and needles, stabilizers, and basic how-to's.   Since she is not a machine-embroiderer, she felt she learned a lot from it.  But it is probably too basic to interest anyone already doing this kind of sewing.

Peggy chose a series of videos on clothing alterations which turned out to cover various alterations to jeans.  Part 1 was very general sewing tips on thread, needles, and various tools that may be useful; part 2 showed how to replace a zipper;  part 3 discussed taking in the center back seam and tightening the waistband; part 4 covered techniques for re-hemming jeans.  She felt they were interesting with lots of information presented and fairly detailed instructions, but are intended more for the experienced sewist rather than a beginner.

Maura watched a series on altering patterns using the Minnott method.  The videos themselves are summaries of the book since it is copyrighted material. They cover topics from how to measure yourself, what measurements you need, and how to mark the pattern pieces for reference.  These videos could be useful to someone new to garment sewing who needs help with fitting a pattern, and even experienced sewists may want another method in their toolbox for making pattern adjustments.

Judy watched a video on Bound Buttonholes.  It covered six different ways to do them, including a paper-pieced method that she found intriguing.   Organza was used to make non-standard openings such as circles, triangles, or any non-rectangular buttonholes.  There was also a way to make them using an embroidery machine, digitizing the shape of the buttonhole.   Bottom line:  this video is best for experienced sewists, as it isn't detailed enough for beginners.  Judy also watched a video on using a French curve.  She found it extremely informative even if not particularly applicable to her own sewing since it seems to be more useful to those designing / drafting their own patterns.

In March we will be starting a Brown-Bag Challenge.  Each member will bring to the meeting a bag (doesn't have to be brown, just not see-through) containing one half-yard (or 2 fat-quarters) of cotton or cotton/poly woven fabric.  Everyone picks one at random, and then has until September to make something creative out of at least 75% of the material.  There is no limit on what to make and you can add other fabrics, trims - whatever you want - as long as you use most of what you got.

And then we had Show-and-Tell - pictured below.

Maura's fused applique quilt in the works

Knitted neck warmer
Peggy's wall hanging

Peggy's sweatshirt jacket from the workshop last month


Kathia's appliqued and embroidered quilt blocks
Pat's scrappy bag - fabrics from a swap

Judy's knit shirt with shirred sides

Judy's skirt with self-ruffle and embroidered cord trim

Pat made a garment!!!!
Connie's stash of vintage patterns from 1949-50

Thursday, January 19, 2017

New Fabric Shop

There is a new fabric shop recently opened in Beacon, called Beetle and Fred.  The link to the shop's page follows. 

http://beetleandfred.com/

or check out the Facebook page, which has some nice photos of fabric she has in stock:

https://www.facebook.com/beetleandfred/

A few members who have visited so far report that although the stock is limited, the owner is starting small and hoping to increase the inventory soon.  Please support these local businesses as much as you can.